
Today, I am going to try to do a post while showing how I make a custom card in MS Paint and breaking down the steps into the most basic forms, so hopefully you are able to follow it. I am going to make a 1993 Topps card of Mike Kingery, the next card up in that set. First off, I have 2 versions of MS Paint open, 1 with a blank file, and the other with a file I created called 'logos', which features some random logos and things. If you haven't got that file yet, just right-click it, press save, and save it. Then, open it up in one of your Paint windows.

Now, you need a photo of Kingery as an Oakland A. I wasn't able to find any after doing a Google search, but was able to find him pictured as an A on a '92 Topps Stadium Club card. Problem with that is that the photo is too small if you zoom in, and has the player name and card logo if you leave it normal size. I was able to smudge out the card stuff. Here is the photo I got.
 Go ahead and go to the bottom right hand corner of your A's template. Click on it, and drag it down and to the right so you have more area to work with. Your screen should now look something like this:


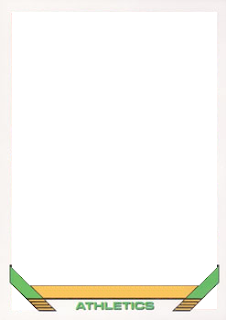
After you have your blank window and Logo file window opened up in Paint, you will need to open up your '93 A's template file in the blank window of Paint. If you don't already have the file, here it is. Right click it, save it, and open it up in Paint.


Go ahead and right click on the Kingery photo, and click copy. Then, go into the A's template window of Paint, and right click, and click paste. While holding the left mouse button as the mouse is over the Kingery photo, move the photo to the left of the A's template. Your screen should be similar to this.

The next step is sometimes unneccessary, but sometimes it will save you a little time. Go ahead and select a random color like pink. Click on the Paint bucket, and fill in the 3 completely white areas of your template with the pink color. Your Paint window should have Color 1 listed as pink, and Color 2 as white. Color 2 is the background color, so whatever color the background is, will basically appear as clear. You will find this out in a second. After you have colored the 3 areas pink, the screen should look similar to this.

Now that I have had you color the 3 areas pink, go ahead and instead of left clicking the 3 areas, right click them. This will paint them the background color.
This next step is what makes combining the template and photo possible. Go ahead and click on the area underneath the rectangle on the Paint dashboard that says 'select'.

On the very bottom choice, which says 'transparent selection', make sure it is checked.

Now, anything that is the background color (Color 2) will be transparent when it is placed over something. This will allow all of the white areas on the A's template to be clear and allow the Kingery photo to show through it.
Select the A's template by holding the left mouse button in, starting from somewhere under the bottom right corner of the A's template, and then drag it all of the way up to the top left of the A's template.

While the rectangle box is around the A's template, left click the middle of the A's template and hold it down. This will allow you to drag it wherever you want to in the window. Go ahead and drag it over the Kingery photo, making sure not to go too far (else you will show some of the edges of the Kingery photo. Now you have a basic card. Click on a blank area of the paint window away from the new card.

Select an area around your new card, and drag it back to the top left area of teh Paint window. Make sure not to drag too far so you don't cut off any of the border.

In order to do the name, you need the correct font, which is Superclarendon. You can download it here. The '93 Topps set kind of has a shadow effect on the name, so we will do the name in black first, and then in red. Select the black color box, and click on the text tool box on the dashboard (the 'A' on the right of the paint bucket).

Now, click on the yellow bar on the card (where the name will go). It should make a text window something like this.

If the box isn't exactly in the area you want it to be, you can use the white squares around the text box to resize it. You can do this either before or after you place the text. Go ahead and type out 'MIKE KINGERY' (in all caps, since '93 Topps is in all caps). I used 9 as the font size.

Click on a white area of the paint window, select red as a color, re-do a text box, type out 'MIKE KINGERY' again, and then use the white boxes around the text window to put it into the correct position. We are almost done.

Remember the 'Logo' file sitting all alone in the other Paint window? Go to it, find the black Topps logo at the top left, which is at the very top, between the white Topps logo and the #1 Draft Pick banner. Select it, right click it, and copy it.

Go back to the Paint window with the card in it, click on the select rectangle, right click on the screen and click paste, and move it into position on the card wherever you would like it.

Now all you need to do is drag the outer edges of the Paint window, and move them to the edges of the border of your new card. Once you do that, all you need to do is save the photo.

Your window should look like that at the end.
I hope this helps you understand how I make customs in MS Paint and maybe allows you to do so yourself.
I hope this helps you understand how I make customs in MS Paint and maybe allows you to do so yourself.
Thanks for checking out my latest post.
-Jeremy
Thanks for sharing! I'd like to see how others do it just to see what they do different.
ReplyDeleteYou should post a zip file of the logos that you have on this post
ReplyDeleteYou should just be able to right click the file and save it.
ReplyDelete